
Resize root partition on EC2 for centos6-hvm-ami
Overview
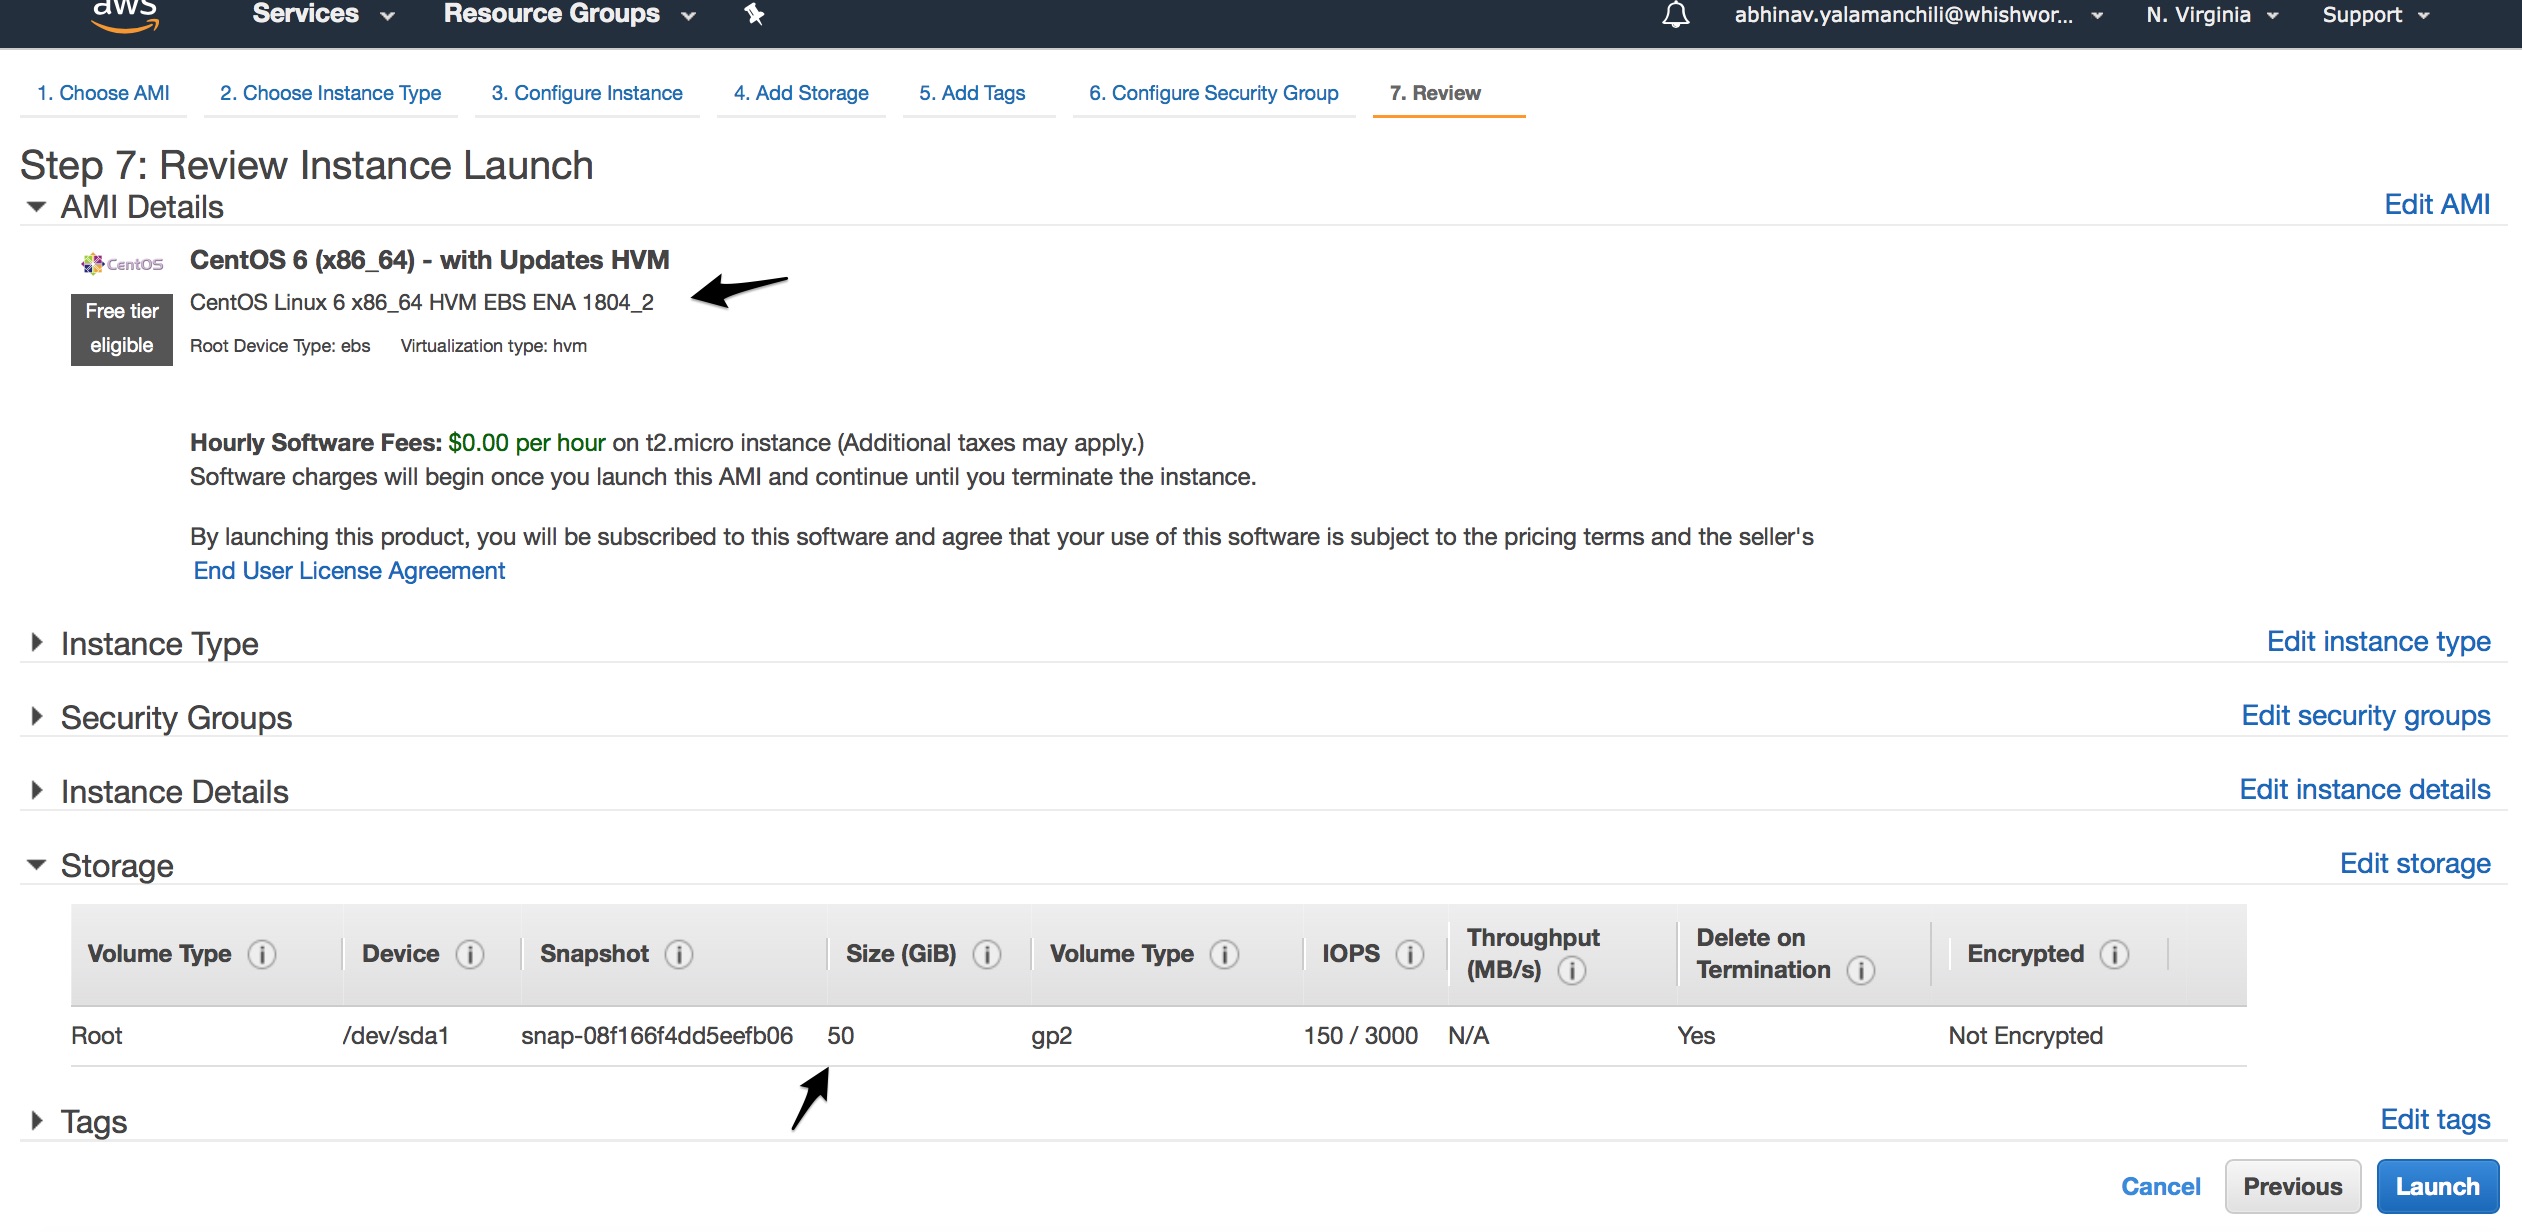
When you launch an EC2 instance using the CentOS 6 (x86_64) - with Updates HVM ami even though we have allocated a bigger EBS volume on /dev/xvda the root filesystem (/) is mounted on /dev/xvda1 of only 8Gb size and rest of the volume is unused. User’s who don’t notice this run out of / filesystem and struggled to expand the filesystem.
your disk looks like this:
/dev/xvda
|__/dev/xvda1__|______________ Free space______________|
It needs to look like this:
/dev/xvda
|______________________/dev/xvda1______________________|
Simple resizing of partition requires us to take snapshot, unmount the disk and then expand it, which is not possible on root volumes;
centos@ip-10-0-0-23 # resize2fs /dev/xvda
resize2fs 1.41.12 (17-May-2010)
resize2fs: Device or resource busy while trying to open /dev/xvda
Couldn't find valid filesystem superblock.
so we need to perform the following operations
- Take a snapshot of the root EBS volumes ; incase you mess up the boot disk, you can reattach the old one.
- Next we extend he disk
xvdai.e increase the EBS volume size if required. - Next extend the partition
xvda1. - Then extend the filesystem(
/).
Procedure
Take snapshot
To create a snapshot for an Amazon EBS volume that serves as a root device, you should stop the instance before taking the snapshot.
To unmount the volume in Linux, use the following command, where device_name is the device name (for example, /dev/sda):
umount -d device_name
To make snapshot management easier, you can tag your snapshots during creation or add tags afterward. For example, you can apply tags describing the original volume from which the snapshot was created, or the device name that was used to attach the original volume to an instance.
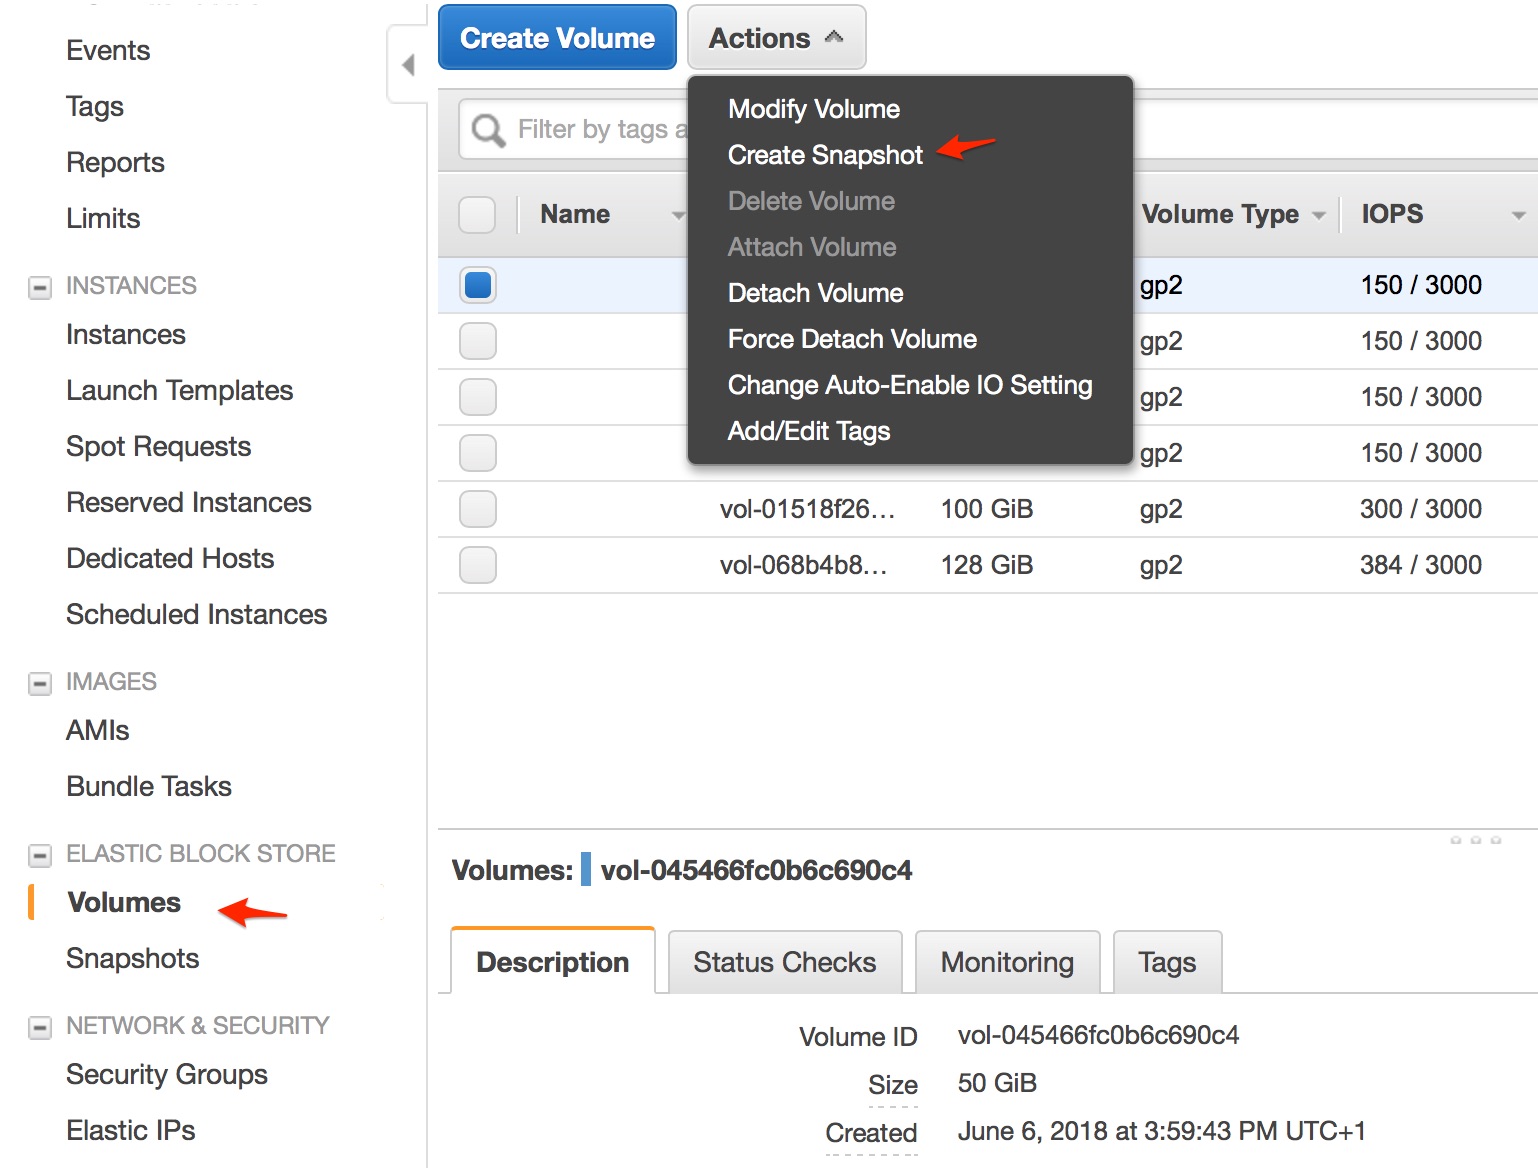
To create a snapshot using the console :
- Open the Amazon EC2 console at https://console.aws.amazon.com/ec2/.
- Choose Snapshots in the navigation pane.
- Choose Create Snapshot.
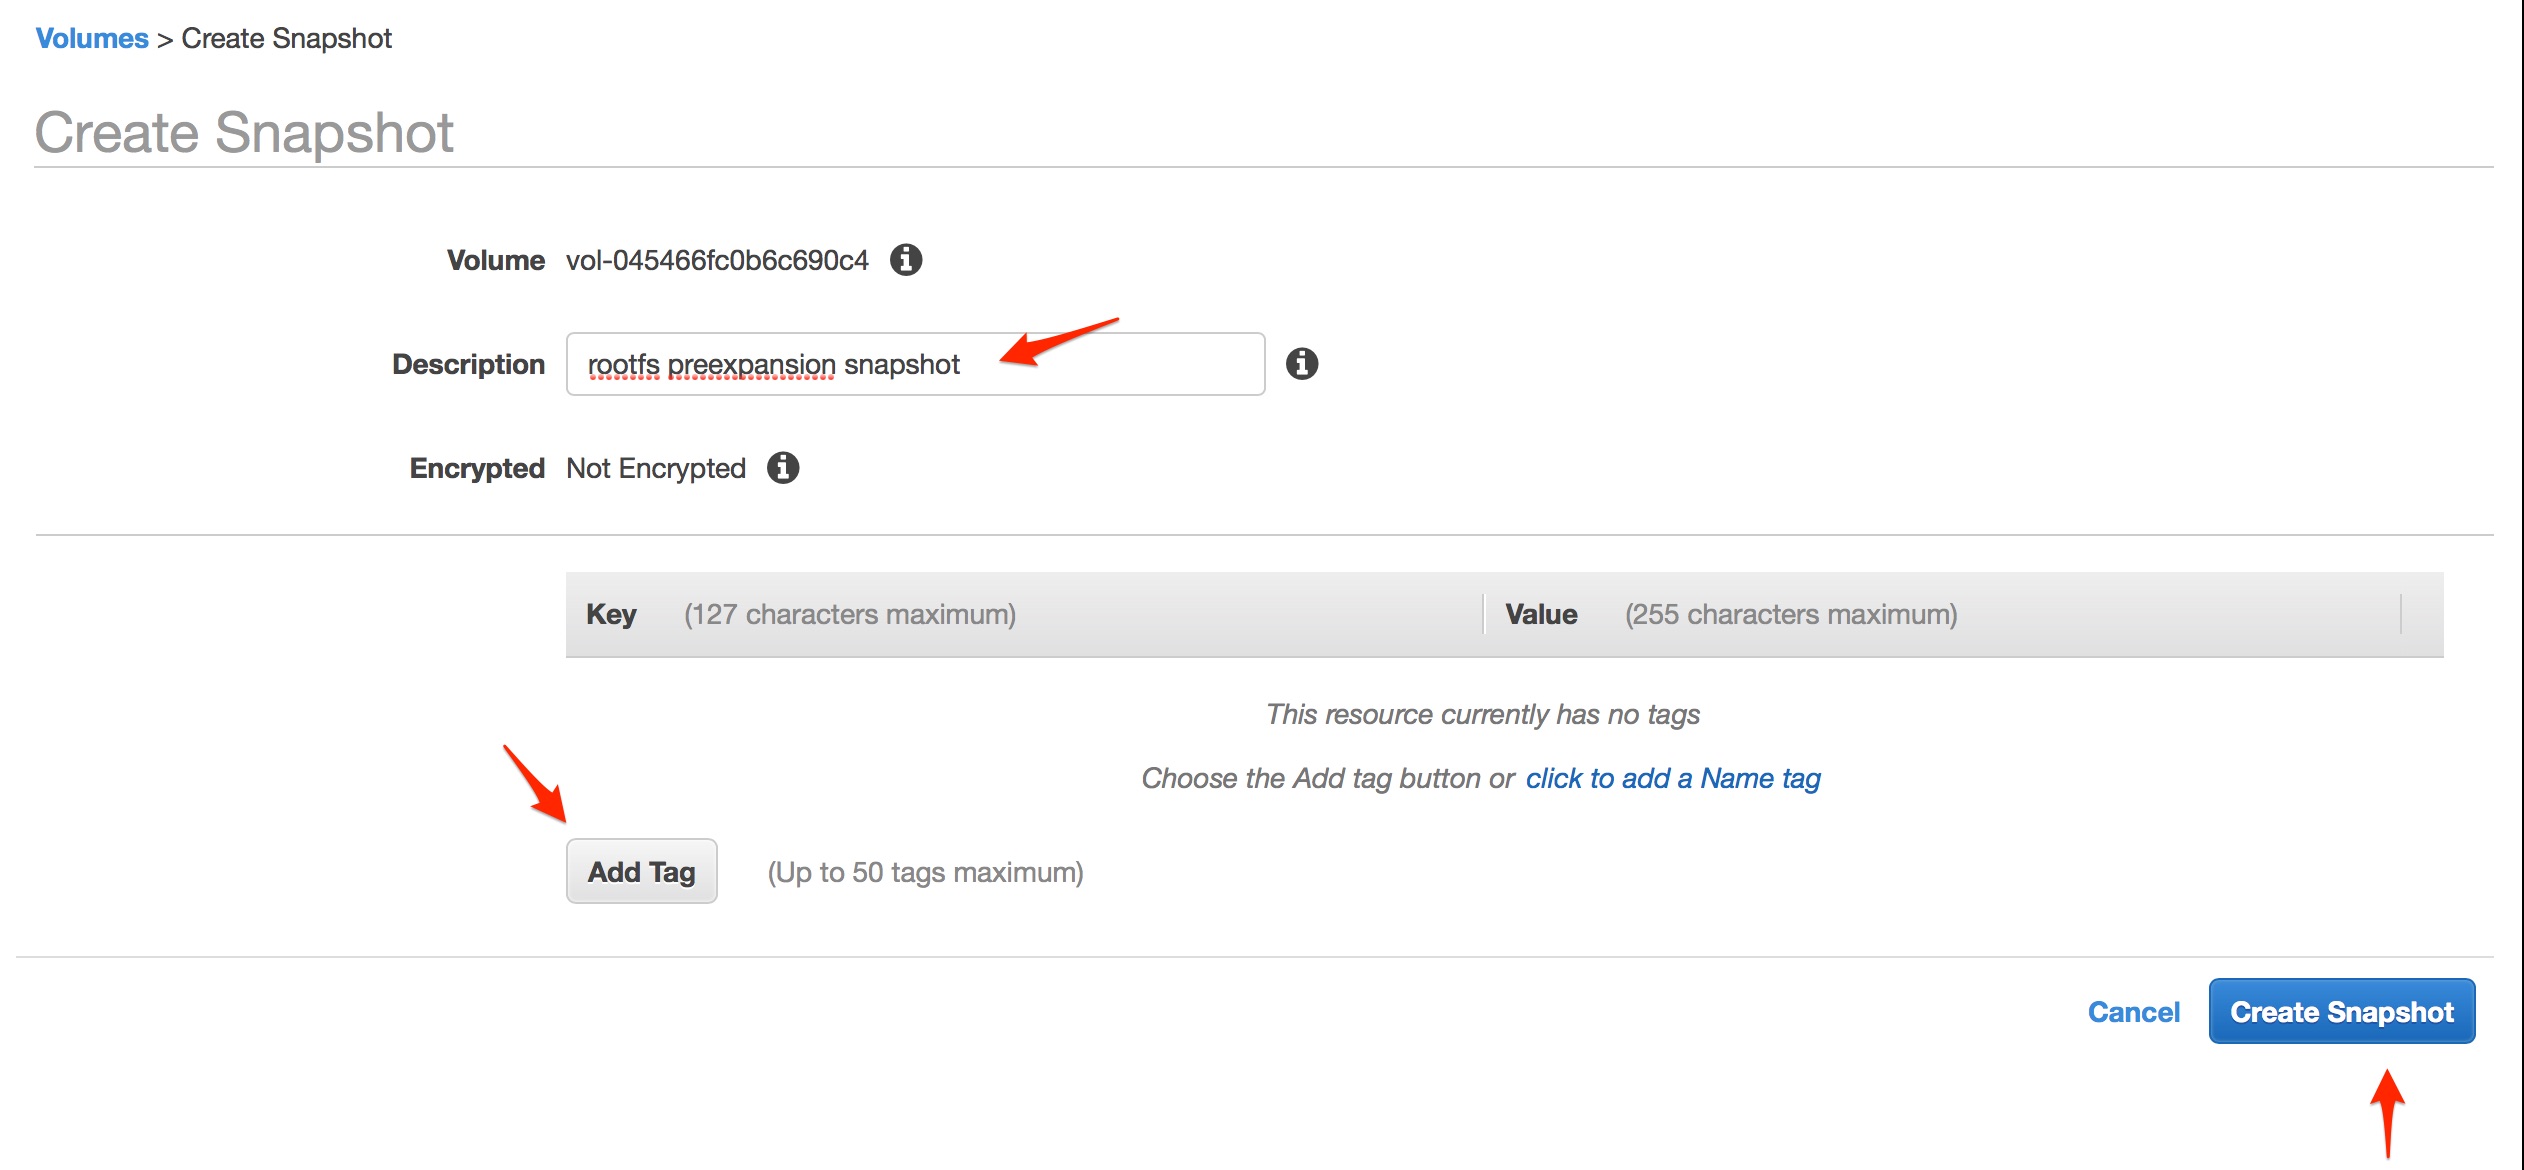
- On the Create Snapshot page, select the volume to create a snapshot for.
- (Optional) Choose Add tags to your snapshot. For each tag, provide a tag key and a tag value.
- Choose Create Snapshot.
Extend the disk
Login to AWS EC2 console, click on Volumes under Elastic Block Store in left-hand side menu. Select volume which is attached to your EC2 server and you want to extend. From Actions drop down menu select Modify Volume You will see below screen :

Change size (in our case we changed from 8 to 50GB) and click Modify. Accept the confirmation dialogue box by clicking Yes.
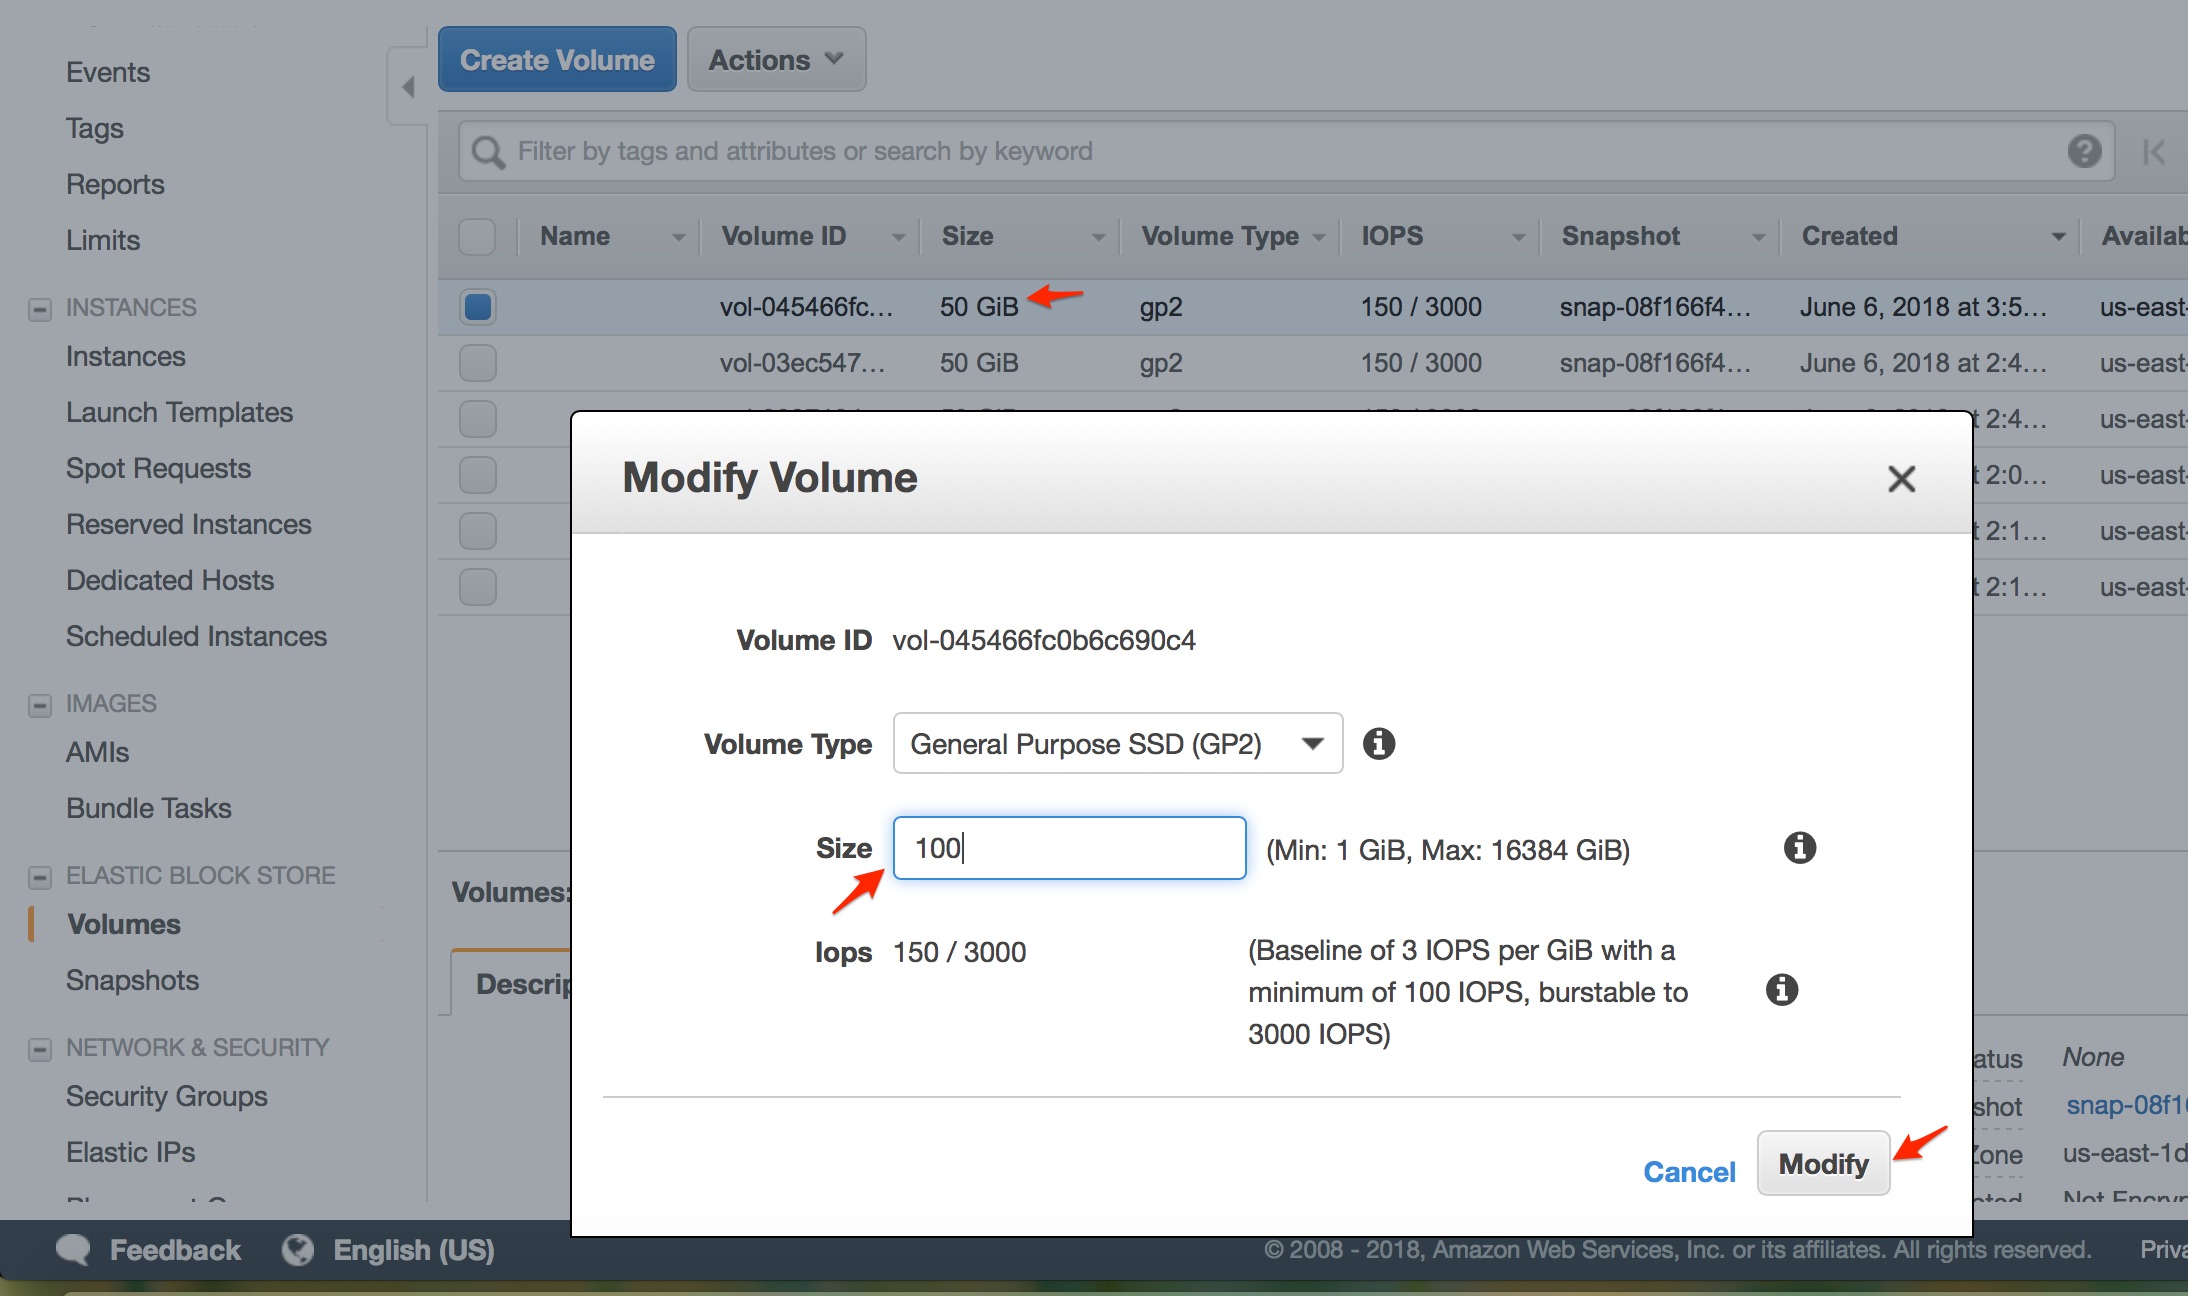
Once modify operation succeeded, refresh Volume list page and confirm new size is being shown against the volume you modified just now. Now, your EBS volume is extended successfully at AWS level. You need to extend it at OS level now.
Extend the partition and filesystem
Since EBS volumes size has been changed you need to rescan it in OS so that kernel and volume managers (LVM in our case) should make a note about new size. In LVM, you can use pvresize command to rescan this extended EBS volume.
centos@ip-10-0-0-23 # pvresize /dev/xvda
  Physical volume "/dev/xvda" changed
  1 physical volume(s) resized / 0 physical volume(s) not resized
After successful rescan, check if the new size is identified by the kernel or not using lsblk command.
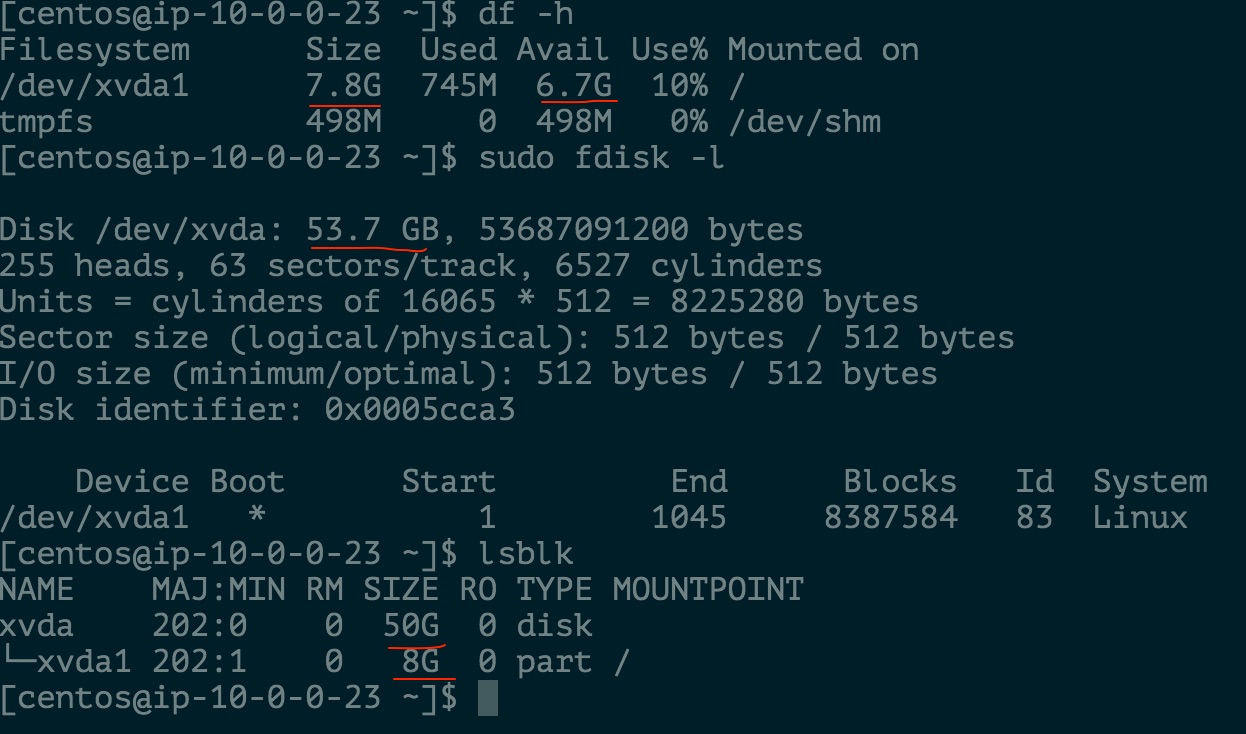
You can see in above output, now xvda disk is shown with size 50G! So, new disk size is identified. Now proceed to extend / file system on xvda1.
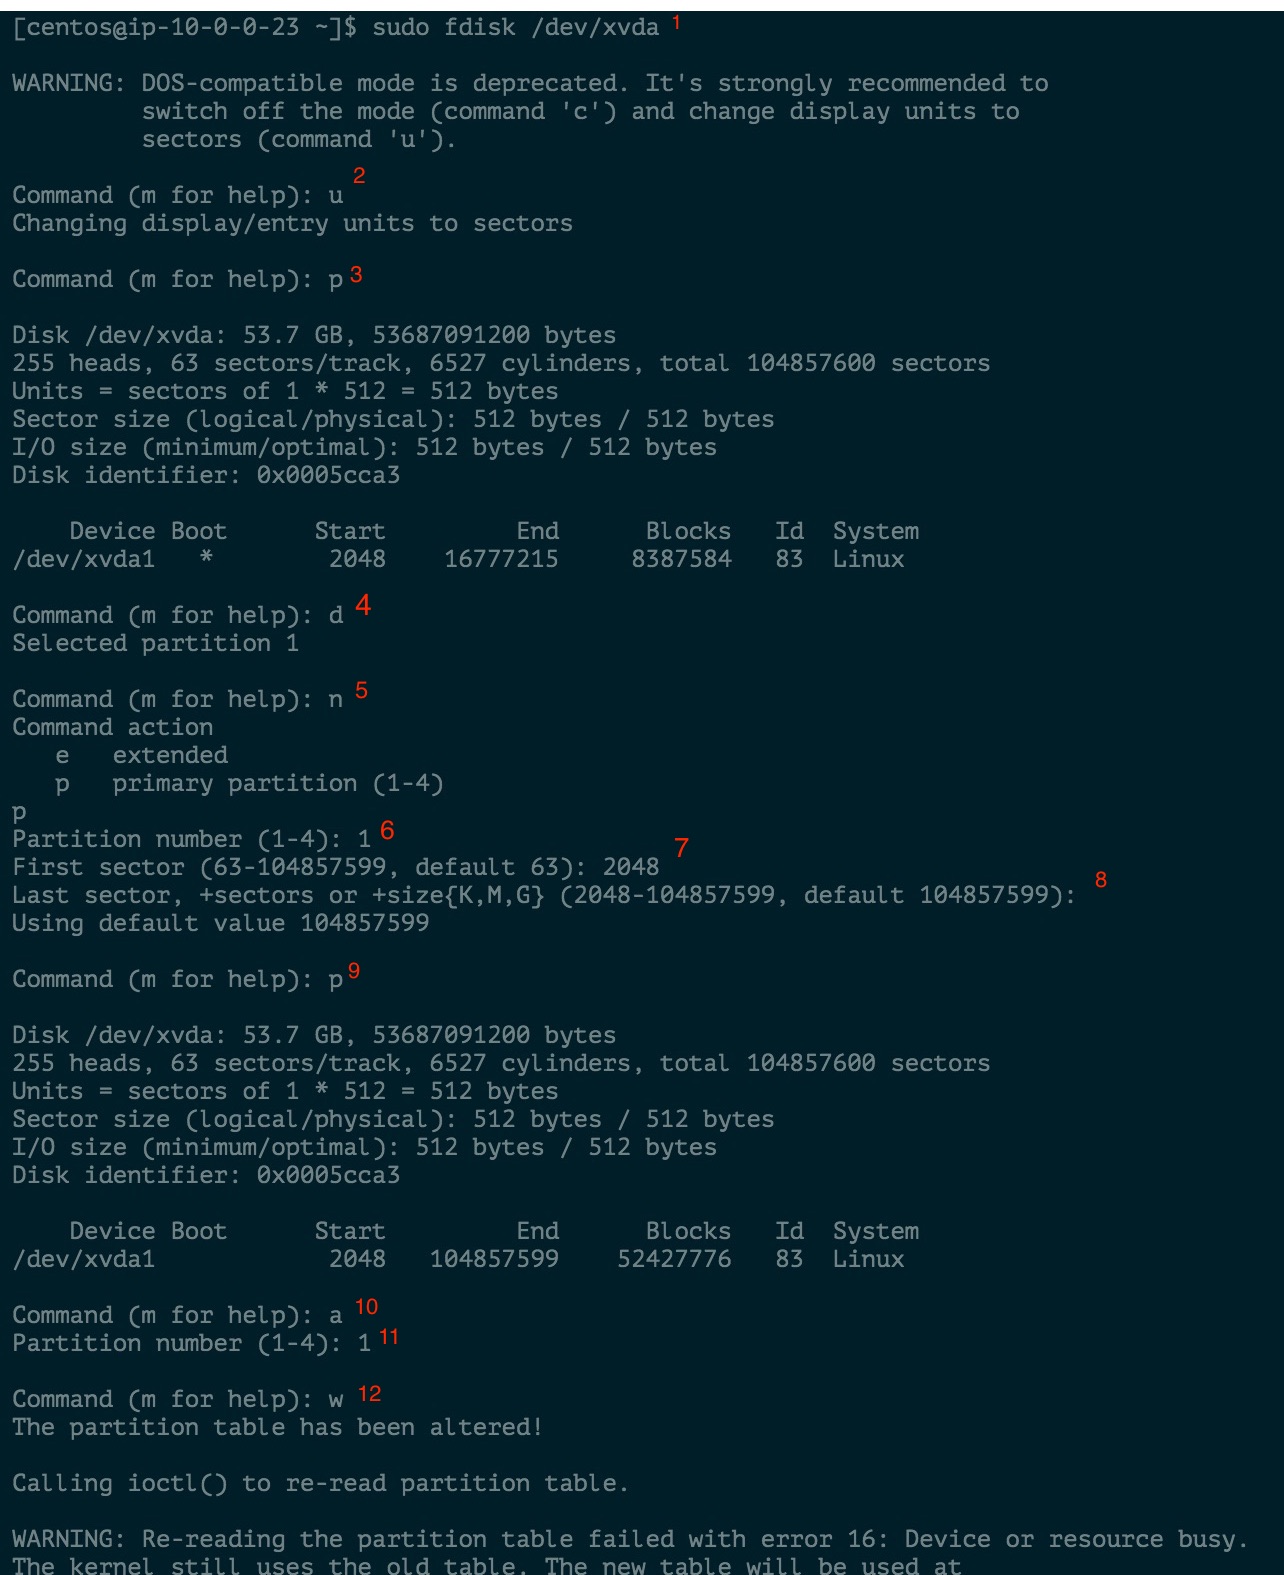
Using fdisk we can increase block size by deleting and creating it and make the partition bootable. All it requires is a reboot. It wont effect your data if you use same start cylinder.
Steps
- Run command
fdisk /dev/xvdato manage the root partition - Change display units to sectors using input
u - Print the partition table with input
p - Delete partition
1(which is/xvda1) using inputsdand1 - Now add a new primary partition (which is also
/xvda1) using inputsnandp - Set the partition number as
1 - Start the first sector at
2048.Warning: Don’t choose the default as it will make OS unbootable. - Leave the default value if you want expand partition to the whole disk.
- Print the partition table with input
pto check for the new expanded sector information - Toggle the newly created partition as bootable with command
a.Warning: If skipped it will make OS unbootable. - Input the partition number.
- Write the modified table to the disk and exit the manager.This only modifies the partition table, not the actual data.
- Run the command
rebootto affect the changes made to the disk.
Reboot and Verify
Check if the mount point / is showing new bigger size.
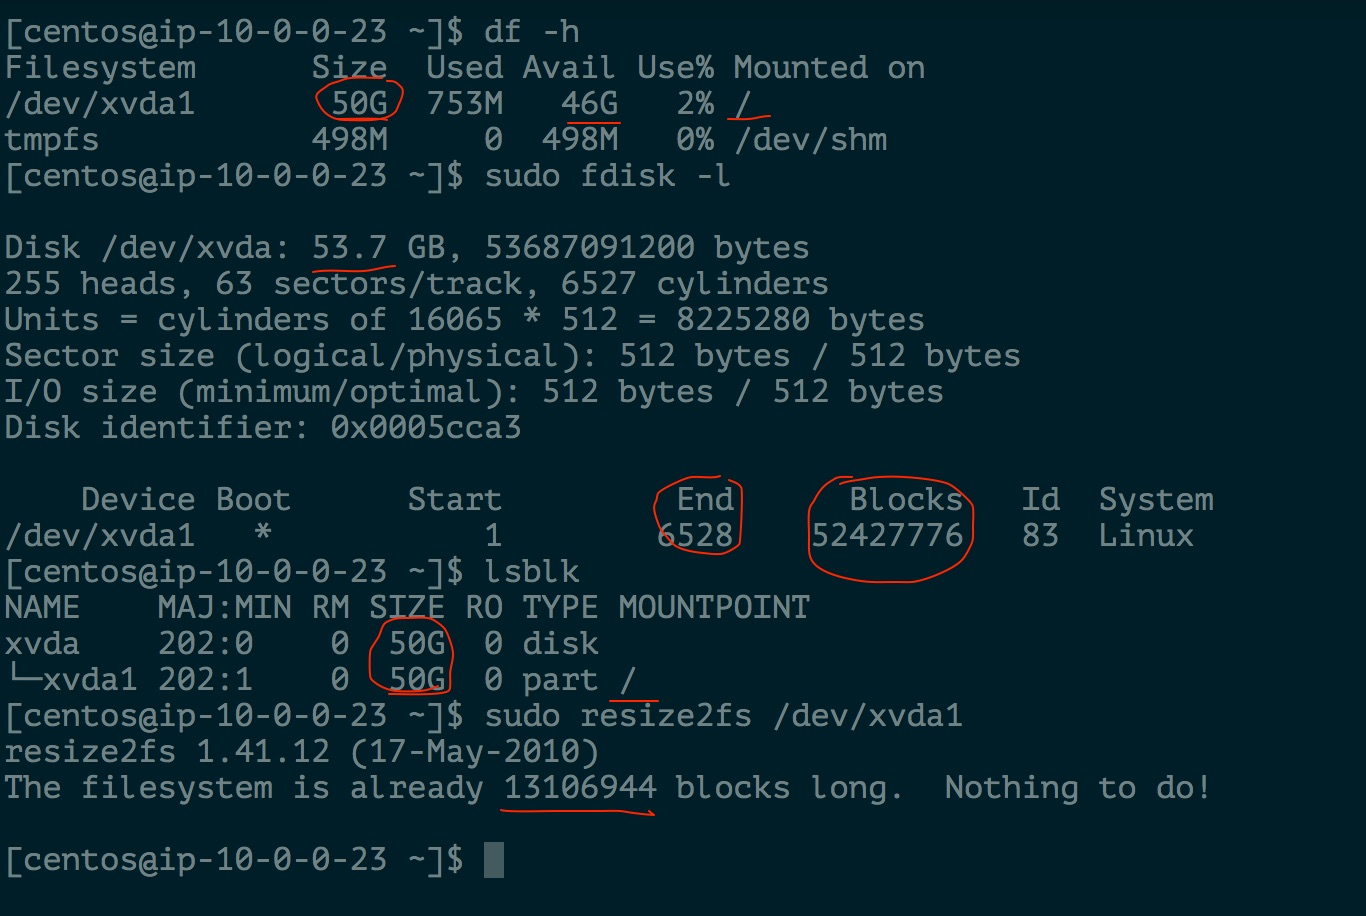
Yup. you can see as we planned out / mount point is now 50G in size from 8GB earlier size.
Leave a Comment