
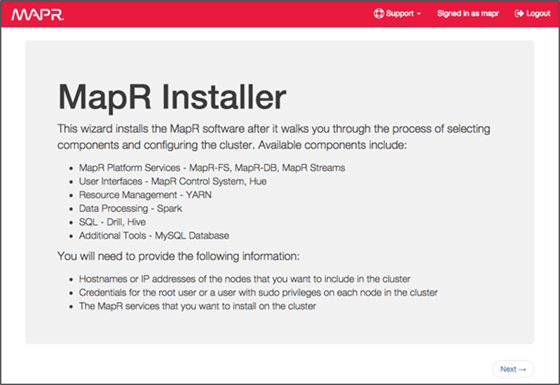
Install MapR Converged Data Platform.
Pre-Install Checks
- Verify prerequisites on every node!
- Correct any problems before you start installation.
- Nodes that are out of spec are a common cause of a failed installation
- Check the documentation for the full list of prerequisites
Installation Overview
- Download the
mapr-setup.shscript to the node that will be part of the clusterwget package.mapr.com/releases/installer/mapr-setup.sh - Run the script as root
bash ./mapr-setup.sh - The script will perform the following tasks :
- Verified dependencies on the install Nodes
- Checks internet connectivity; if not available it uses archive files.
- Establishes MapR administrator account (
mapr) - Creates Repository with required package files; if you provided packages in archive files it will create a local repository.
- Start the MapR Installer Web Interface on Installer node in webbrowser.
https://<external IP address>:9443 - Login as MapR administrator (default is
mapr) - Provide the details to installer as required and finish the installation.
Prepare to Install
Information to provide:
- Nodes to include in the cluster
- Services to install on the cluster
- Credentials for the MapR administrator account
Select Version and Services
Version and Edition
Select the Community Free Edition or Enterprise Edition if you have the License
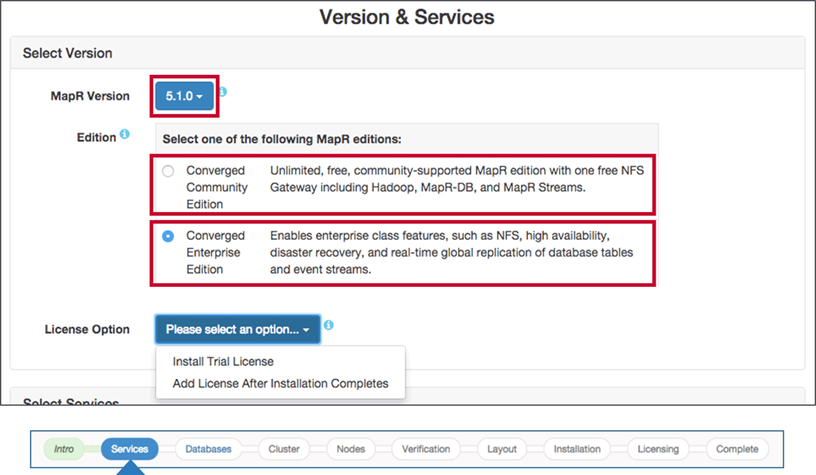
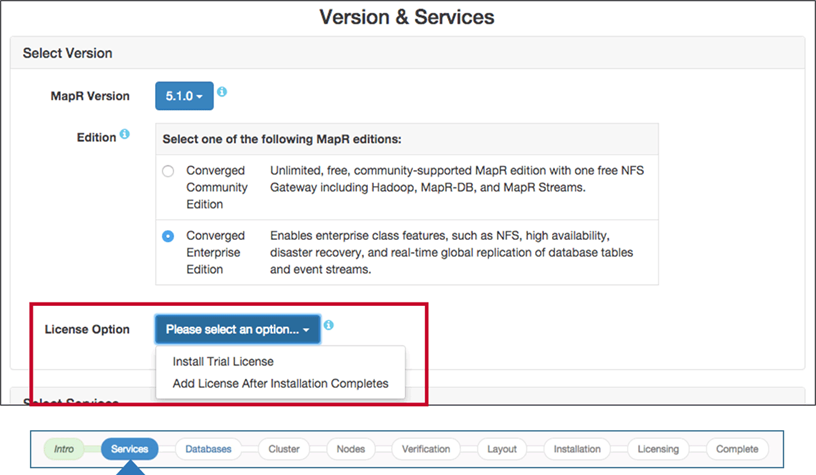
License Option
Get Trail License from you MapR Account or directly signup with the install later which will download the license.
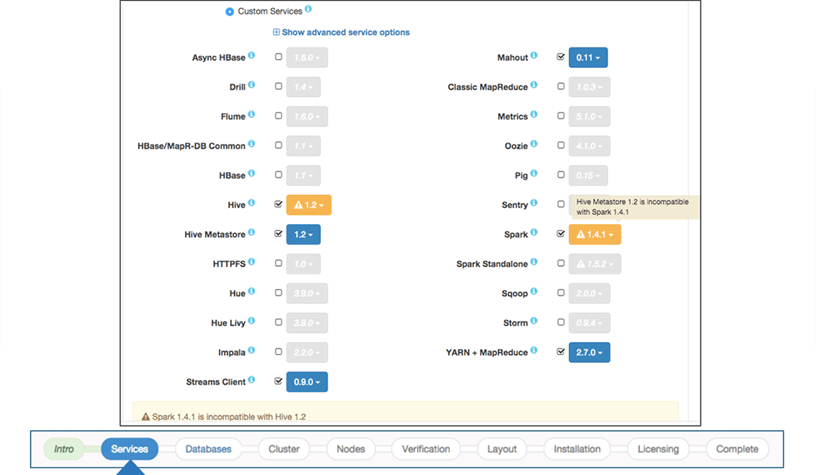
Select Services: Overview
Select Pre-Provisioned Templates and Expand Show Advanced service options to see the summary of components installed.
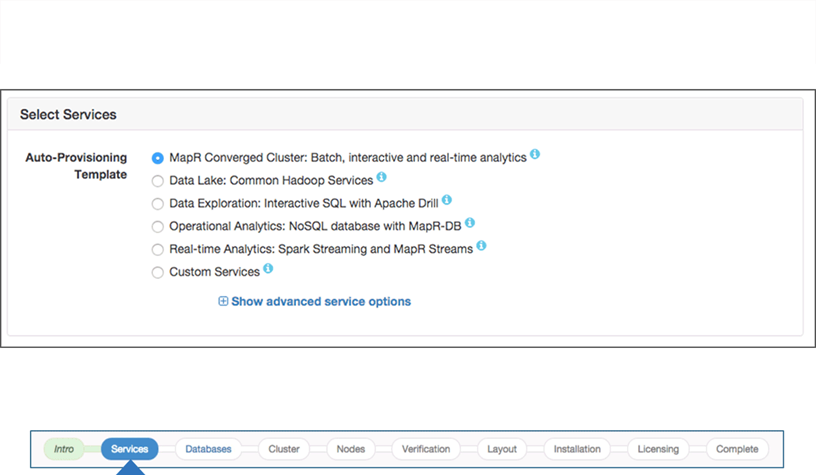
Custom Services
Also you can choose to install custom services and versions. Warnings will be displayed when incompatible services are selected as shown below.
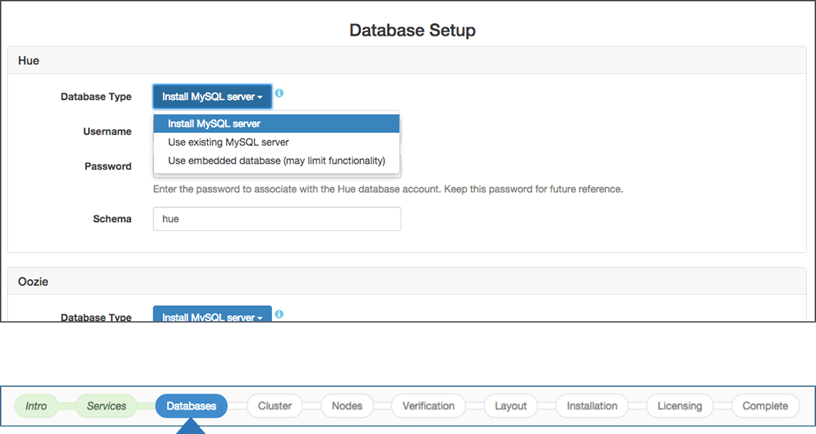
Database Setup
Fields displayed will depend on services selected. If you choose to install Hue, Hive, Oozie or Metrics enter the database information as shown below:
Database Type- Use Embedded
- Existing MySQL server
- Install MySQL Server
Usernameandpasswordfor DB User- Name for each
DB Schemalike hue , oozie, hive etc..
You can also choose to have multiple database types but create unique users for each database.
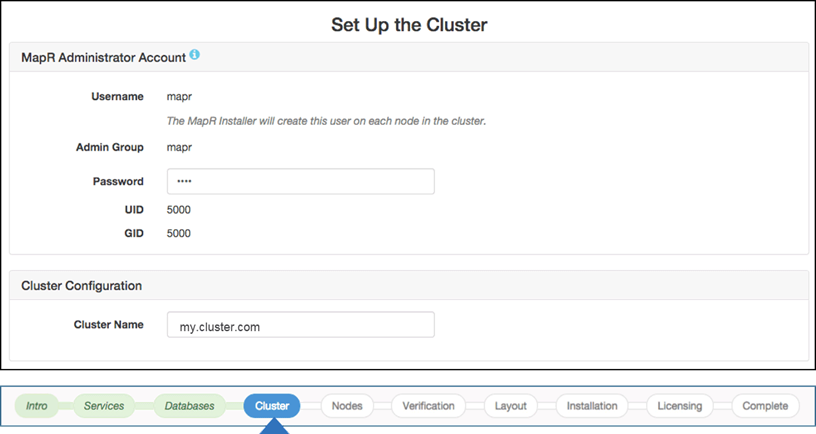
Set Up the Cluster
- In the Setup Cluster screen provide the
mapruser details created earlier. - In the
Cluster Namefiled enter a unique DNS name for the cluster likemymapr.test.com
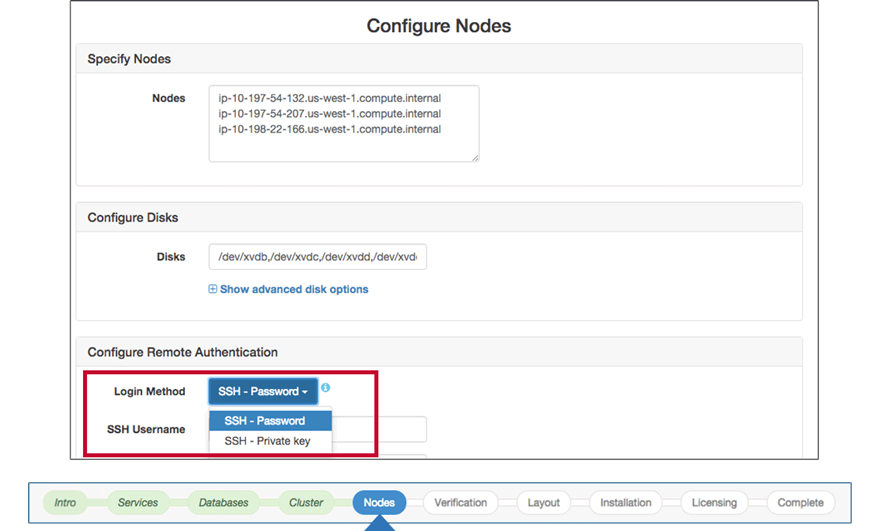
Configure Nodes
On the Configuration page enter resolvable IPAddress/Hostnames/HostNameExpressions for the nodes that need to be included in the cluster.
Note: If you are using cloud like AWS/Azure use internal resolvable privateIP address or FQDN.
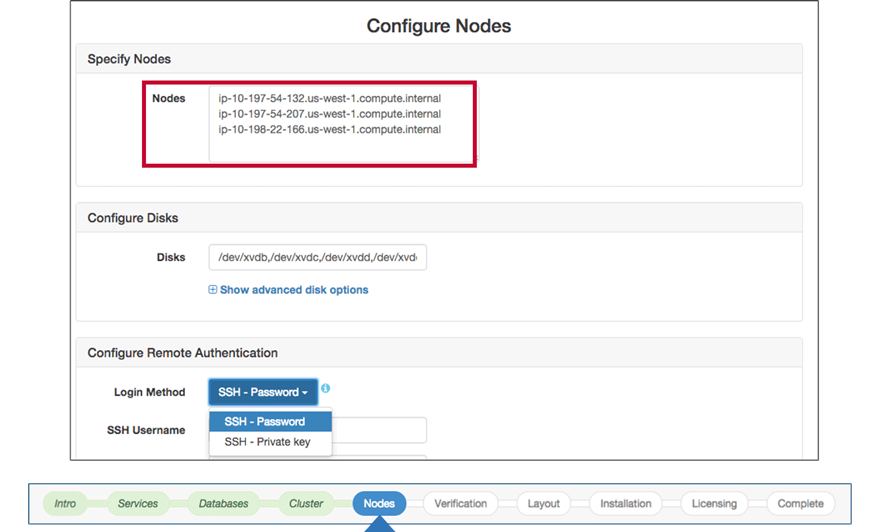
Configure Disks
In the Disks section enter a , list of disks to use (Unused and Unmounted disks). By default disks are configured to be reformatted under Advanced Disk Options
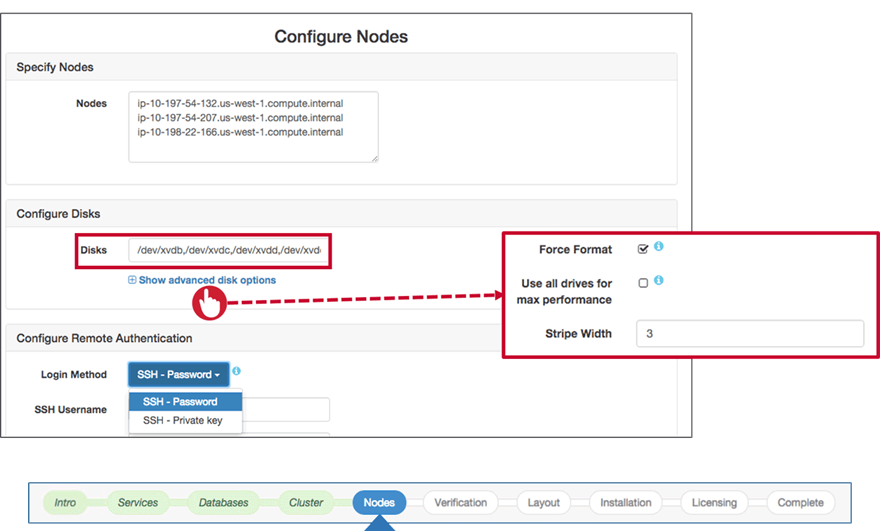
Configure Remote Authentication
Use Passwordless SSH between nodes to connect instead of mapr password.
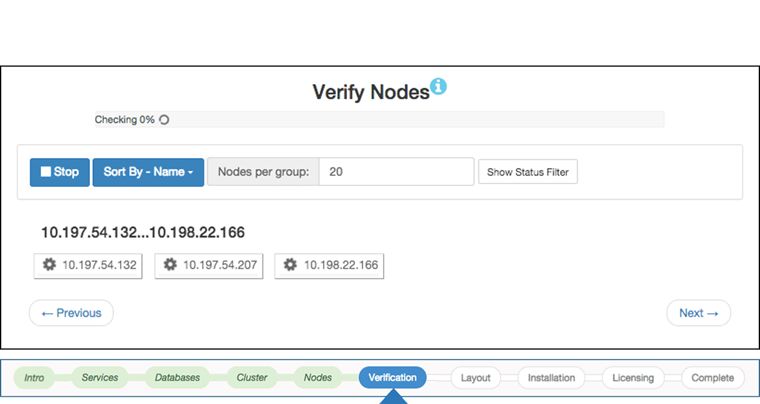
Verify Nodes
Verification Process
Installer will connect to all nodes and check if they satisfy minimum requirements. Notice the Following Indication on each node icon :
- White - Verification InProgress
- Green - Ready for installation
- Yellow - Warnings but can be installed
- Red - Node cannot be part of cluster
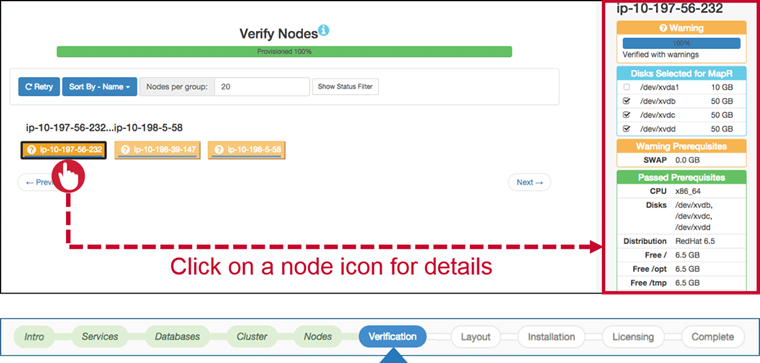
Verification Problems
If Node verification posts Warnings or Errors, Click on Node Icon and see the recommendation failed and correct them manually.
If the problem cannot be resolved , remove the node from the Specify Nodes step by reviewing it.You can add the node at later point of time by resolving the issue.
Configure Service Layout
Default Service Layout
After Verification as default service layout window is displayed as shown below:
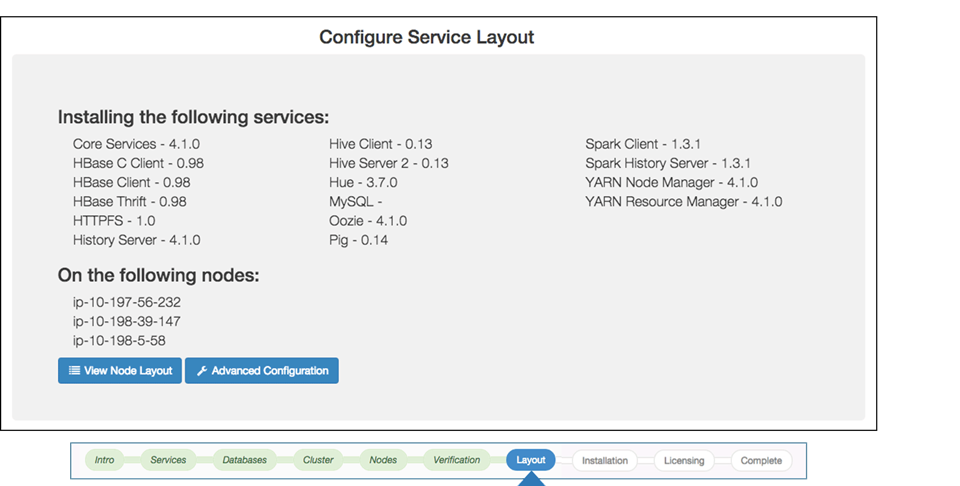
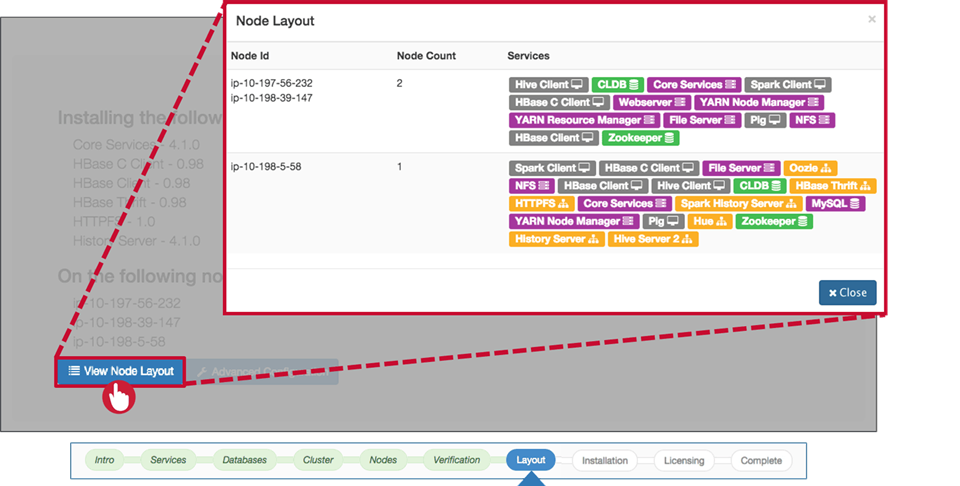
View Node Layout
Click on View Node Layout to examine the which services are installed on which node.
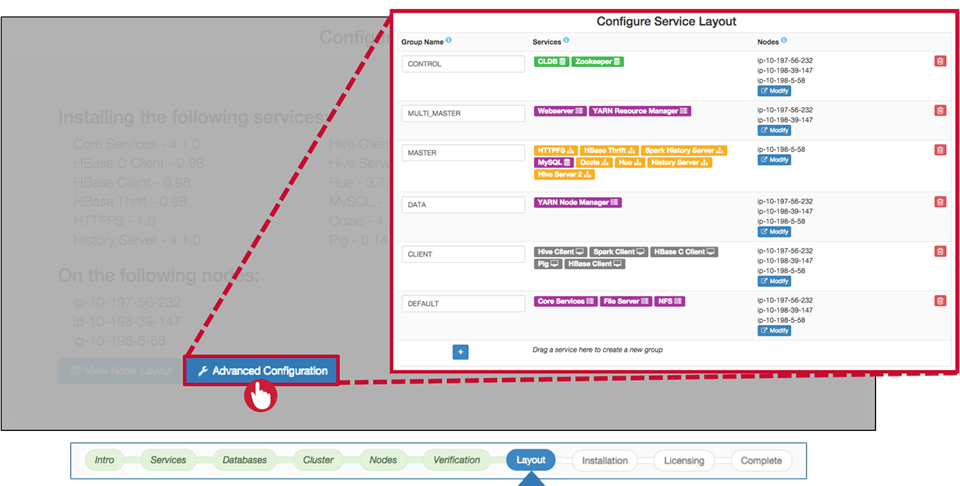
Advanced Configuration
You can modify the default service layout as per needs by clicking on Advanced Configuration as shown below by drag&drop components and nodes.
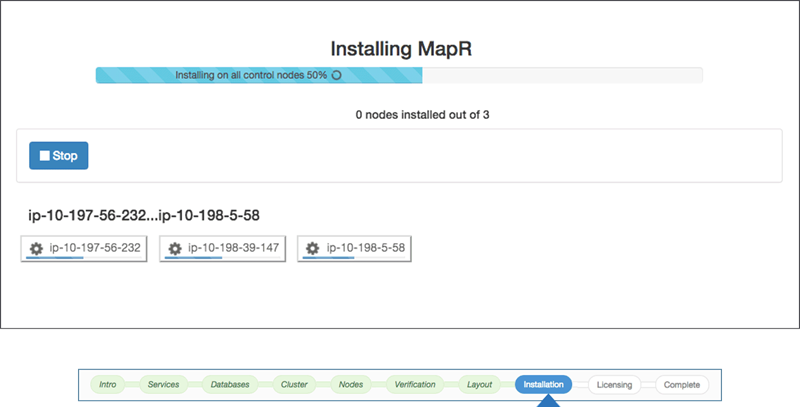
Install MapR
Installation
Click Next to begin Installtion and Monitor the Progress of Installation.
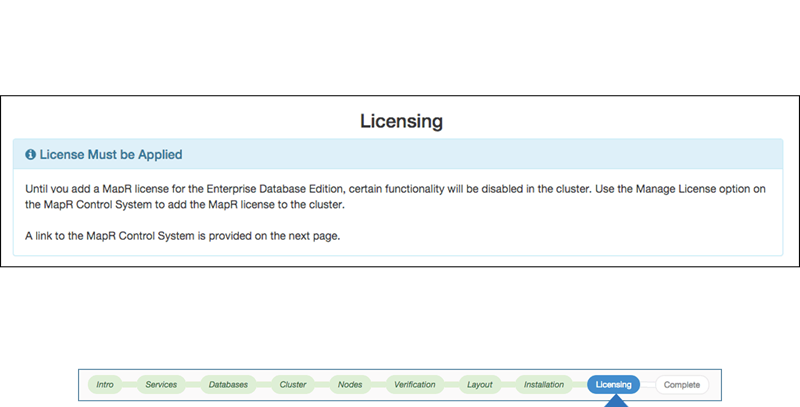
Completion
When finished installer will suggest whether a valid license to be applied or not in the later stages for all services to work.
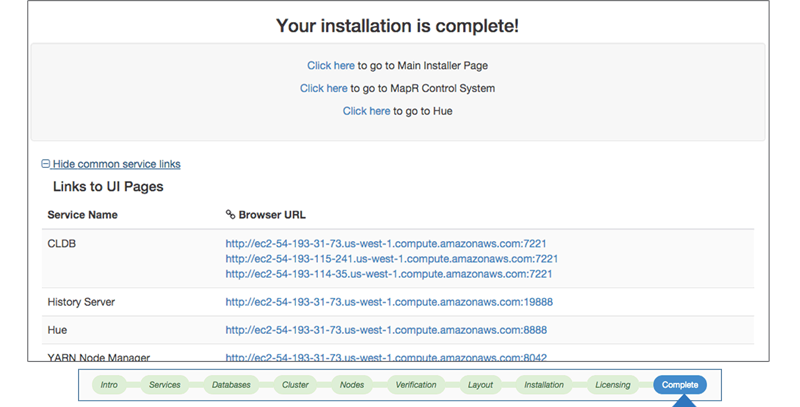
Service Links
Once Installation is completed a list of Service URLs like CLDB, History Server , Hue and MapR Controller are provide. Login to those services and monitor status of components.
Add a MapR License
Apply a License
Follow the steps below to install/update a new license :
-
Log into the MCS
https://<node IP address>:8443as usermapr.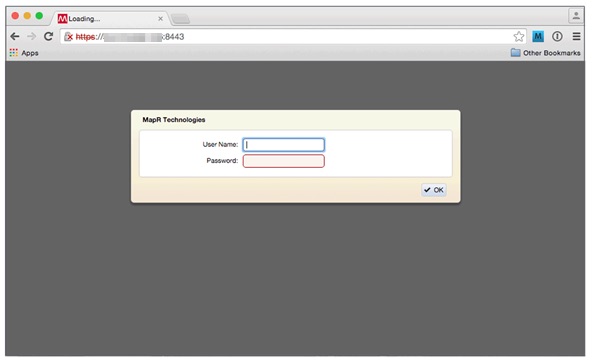
-
Click
Manage licenseson Top Right Corner.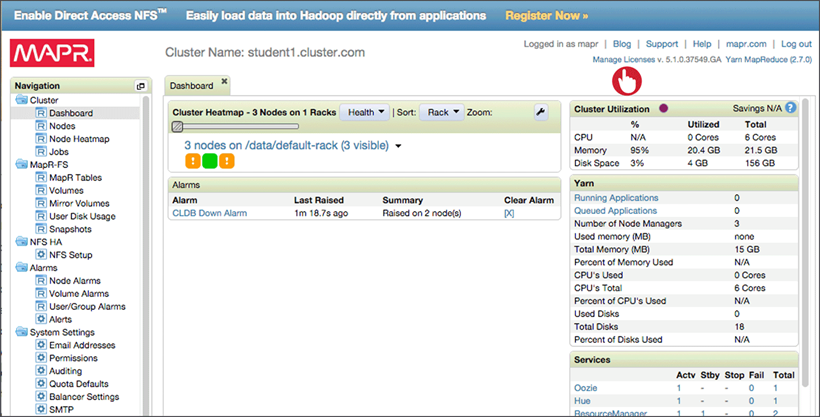
-
Upload or Copy-Paste the licenses and Click
Apply Licenses.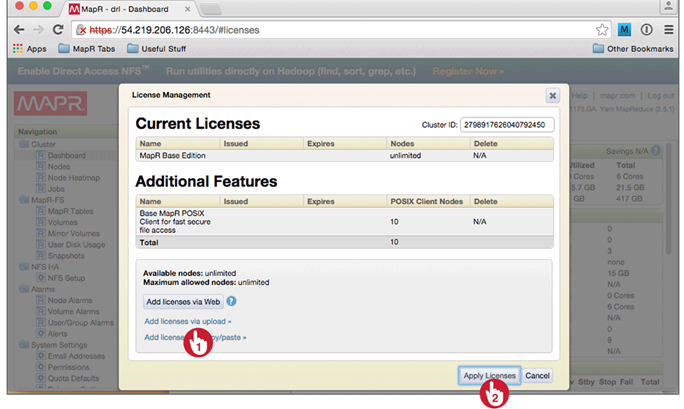
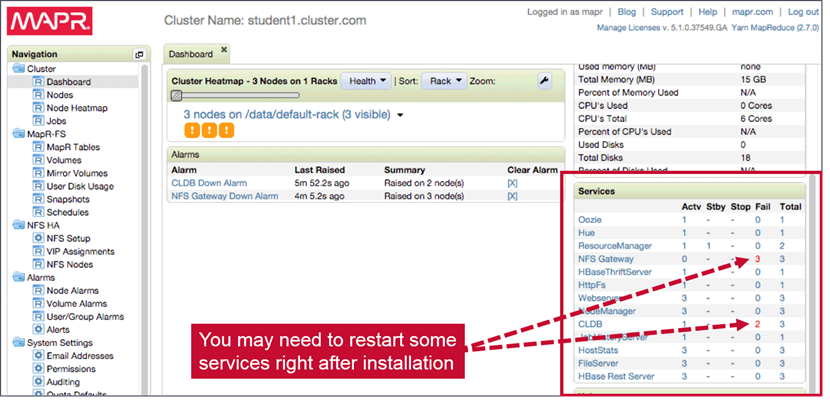
Restart Services
-
After Installing License review the cluster dashboard to see some failed services because MapR tried to start these services without a valid licenses.
-
Click on
Manage Servicenext to the node with failed service where you canStart,StoporRestartServices.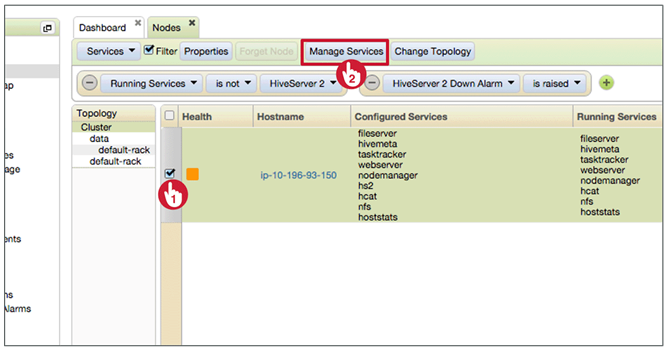
This concludes the installation of MapR Enterprise Edition with a valid license. Read the Next article to manage MapR Configuration.
Leave a Comment